When you adhere to a few fundamental rules, stenciling furniture is simple. Your stenciling project should be enjoyable and fulfilling if the furniture is properly prepared, the right tools are used, and the proper techniques are employed. Continue reading, you will learn how to stencil furniture perfectly.
Table of Contents
What You’ll Need?
- Your Cutting Edge Furniture Stencil
- Low Tack Painters Tape
- Sandpaper
- Adhesive primer (Stix or similar)
- Base Coat Paint (acrylic or latex)
- Stencil Paint (acrylic or latex)
- Clear Polyurethane Top Coat
- Quality Paint Brush
- Stencil Brush/s Dense Foam Roller
- Paint Tray or Paper Plate
- Paper Towels
- Spray Adhesive (optional)
How to Stencil Furniture?
There are eight guides listed to follow.
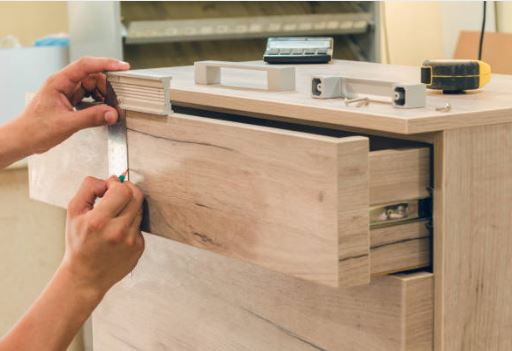
Preparing Your Furniture
Make sure the furniture you’ll be stenciling is prepared before you begin! Placing your exquisite artwork on a surface that has not been properly prepared is absurd. If you need to repaint your furniture, we advise you to first make any necessary repairs, including gluing any loose pieces, filling any cracks, and caulking any gaps. Following that, you can lightly sand, prime, and basecoat your project. You might be able to stencil right over the current finish if the furniture surface is in good shape and the basecoat color is appropriate. To remove any wax or grease, wipe the surface with denatured alcohol before lightly sanding it with a Scotch Brite pad or fine 220 sandpaper. The adhesion of the stencil paint will be improved as a result. However, it’s a good idea to test your stencil paint’s adhesion by using a small amount on a concealed area of your furniture before stenciling any furniture. Test the paint’s durability with your fingernail after letting it fully dry overnight. Your piece needs to be primed and base coated if it comes off easily. It can be challenging to get your stencil paint to adhere to some furniture, like Ikea laminates because they are often very slick. Prior to stenciling, this type of furniture should always be primed with an adhesive primer and basecoat.
Masking
Always use low-tack painter’s tape, such as 3M blue tapes, when stenciling furniture. Masking tape can lift paint, so don’t use it over freshly painted surfaces. For a crisper line, burnish (rub down) the tape’s edge. Masking tape should always be removed gradually and at an angle.
A Few Words About Paints
Primer
To guarantee proper adhesion to your furniture, it is crucial that you use a bonding primer like STIX, Kilz, or BIN. You should lightly sand your furniture to remove any varnish, oil paint, or glossy finishes if it has them in order to reduce shine. This promotes proper primer adhesion. You can even ask your paint retailer to tint the primer to make it more similar to the color of your base coat. For a smooth finish and adequate coverage, use a high-quality brush or even a dense foam roller and apply 2-3 coats. Before applying your base coat, you can quickly sand away any minor flaws, but be careful not to sand through the primer. Before putting on your base coat, let the primer completely dry.
Base paint
At Cutting Edge Stencils, we advise base coating your walls with a flat sheen, water-based paint using a tight nap roller for a smooth finish. Paints with a flat sheen take stenciling better than paints with a shine. Because flat sheen paint is porous, it catches the stencil paint before it has a chance to seep (bleed) under the edge of the stencil, producing a crisper print. Additionally, flat paints are simpler to touch up. They usually blend better without flashing because they are not shiny. (When trying to repair higher sheen paints, like semi-gloss, a difference in sheen is known as flashing.) Thus, if you ever stencil your walls incorrectly, it is simple to paint over the error with flat sheen paint and then re-stencil the area with excellent results.
Stencil Paint
We advise using acrylic or latex paint of good quality on walls. Acrylics for crafts also work well. We also like Benjamin Moore’s “Ben” flat paint for stenciling walls. Both the outcome and the value are excellent. Spray paint is difficult to control, so we don’t suggest using it. Additionally unsuitable for stenciling use paint with an oil base. Metallic paint, glaze, or even plaster can be used to create stencils.
Using Spray Adhesive
Although spray adhesive can give stenciled edges that are more defined, it is not required to use it when stenciling. Spray adhesive can help hold a delicate or large-cutout stencil in place while producing better results. Spray the back of the stencil evenly with your choice of repositionable adhesive (such as Elmer’s). Be mindful of overspray and perform this in a well-ventilated area. To prevent it from adhering to the surface of the project, let the adhesive dry for a few minutes. Throughout the stencil project, reapply the spray adhesive as needed.
Choosing Your Colors
Look at examples of color schemes that complement one another well and create a test sample so you are confident in your selections. Always consider your existing resources, such as the colors of your carpet or floor or the fabrics that are currently in use. For color swatches, we adore using white index cards.
Sample Test
You should always practice your stenciling methods and color choices before beginning a project. It is best to create a sample board, though you can test your stencil and colors in a covert location on your wall. For your sample, you can use a piece of plywood, a pizza box, sheetrock, or cardboard. Use the same paint that will be on your wall to base coat the sample material. Once you’re confident with your technique, you can try a few prints. Testing the sample in various locations around the room will allow you to determine how lighting might impact the color. Finally, you’ll have a sample to use when looking for fabrics and furniture to match your gorgeously stenciled walls!
Placing Your Furniture Stencil
Take your time when positioning your furniture stencil design because layout is crucial. If you’re stenciling an inlay design, consult some references to help you build your layout. Use a wax or chalk pencil to measure and make marks that are easily removed after stenciling but before your protective top coat is applied.
Built-in Registration
A built-in registration feature on the majority of Cutting Edge Stencils makes it simple to align a repeat pattern. The stencil is in line with previously stenciled components as a result. The stencil’s description on our website and the accompanying alignment instructions are both available.
How to Stencil Furniture With Different Tools?
Stenciling With a Dense Foam Roller
This is an incredibly quick method of finishing the task. Excellent for use as a stencil for furniture! Pour your stencil paint into a tray, and EVENLY load your dense foam roller by running it through the paint several times while using medium pressure. We don’t want a roller that looks blotchy. When your stencil roller is completely covered in paint, roll it a few times on some folded paper towels to remove the extra paint. If the roller leaves striped lines on your folded paper towels, reload the roller with a uniform coating before offloading it. It should look like the roller is somewhat dry. Just keep in mind that less paint is always preferable on your roller because too much paint can seep under the stencil.
With light to medium pressure, begin rolling and gradually increase the amount of paint coverage. Avoid pressing too firmly because this may cause paint to bleed beneath the stencil. To check if your paint coverage is sufficient, carefully remove the tape and pull back a corner of the stencil. During the course of your stenciling project, you may need to reload and reload the roller.

Stenciling With a Brush
Sometimes the shape of your furniture prevents you from using a dense foam roller; in these situations, a stencil brush would be ideal. When using a stencil with small openings or when using multiple colors, stencil brushes perform better. When shading or working on tight corners or edges, a stencil brush works wonders. Depending on the size of the stencil openings, choose the appropriate stencil brush size. In general, smaller stencil openings correspond to smaller brushes and vice versa. Pour your stencil paint onto a tray. Dip the stencil brush tip into the paint (only about 1/8″) and then swirl it on the tray to evenly distribute the paint into the bristle tips. Remove any extra paint by pouring it onto some folded paper towels. The brush should look nearly dry, just like the roller. For a softer appearance and shading, use a gentle swirling motion. Avoid using sweeping motions to the edges of the stencil openings as this can push paint under the stencil. Filling in voids with a straight up and down motion, or pouncing works wonderfully. To prevent color contamination when using multiple colors, use a different brush for each hue.
What Are the Tips After Stenciling?
There are three things you should care about after furniture stenciling.
About Paint Bleed Or Paint Seepage
When paint seeps under the stencil’s edge and leaves a less-than-perfect print, this is known as stencil bleed. However, you should take action to lessen the bleeding. Don’t worry about this too much. Recognize that because we’re using a hand-painted finish, there will always be a little bit of minor bleeding here and there. Your eye will notice the color and pattern when the wall is finished and you are viewing the entire project, though. Most of the time, minor bleeding would go unnoticed. But we still want to keep bleeding to a minimum so we follow these guidelines:
Apply a flat base coat of paint. Use a flat stencil paint like “Ben”. Make certain the wall is texture-free and smooth. Avoid overstuffing your stencil roller and gradually increase the paint coverage without exerting excessive pressure. To achieve even sharper edges, use spray adhesive. While the mistake is still fresh, small errors and bleeding can be removed with baby wipes or a moist rag. Alternatively, the errors can be corrected later using a tiny brush.
Protective Clear Coat
You should typically use a sturdy clear coat to protect your newly stenciled furniture. A water-based clear coat is advised because it won’t turn yellow over time. For best results, use a premium brush or even a dense foam roller to apply 2-3 coats. A clear coat should never be shaken because doing so can cause air bubbles to appear in the finish. Before applying, give it a slow stir with a stirring stick.
Clean Up
The paint comes off much more easily if you clean your brushes, rollers, and stencils as soon as your project is finished. Keep your stencil brushes out of the water for a short while because the natural bristles will expand and could split the metal ferrule. For cleaning brushes, use a drop of Murphy’s Oil Soap or brush cleaner. Better paint residue removal from brush bristles is made possible by using a brush scrubbing tool. Keep your brushes and rollers moist throughout the project. Put them in a plastic baggie or cover them with a damp cloth if you need to take a break.
After each repetition, your stencil does not need to be cleaned. When there is a noticeable buildup of paint, which typically occurs after numerous repetitions, it’s time to clean the stencil. 15 or more repeats, in our experience. A medium-sized accent wall can frequently be stenciled in its entirety without the stencil needing to be cleaned. Your stencil can be cleaned by laying it on a flat surface, like a cutting board or cookie sheet, spraying it with water, and then gently clean it with a dish brush while it is under running water. Make sure a sink strainer is in place to collect any paint chips. If the paint on the stencil is very dry – we call it “caked” – let it soak for a while before scrubbing it. The cleaned stencil should be placed on paper towels, where it should be rolled or patted dry.

How Do You Stencil Furniture Without Bleeding?
Use painter’s tape or spray adhesive to secure the stencil to the surface, so it doesn’t move. The spray adhesive will provide security that the stencil won’t move or the brush won’t catch the edge and cause paint to bleed underneath. Place the stencil on the surface after lightly misting the back with adhesive.
FAQ About Furniture Stenciling
Where to Buy Stencils for Painting Furniture?
My favorite place by far is a royal design studio. Stencils for art projects, however, are widely available. To name a few, Lowe’s, Michael’s, Hobby Lobby, Canadian Tire, and Home Depot. Amazon and Cutting Edge Stencils are both excellent options.
What Things I Can Use as Stencil?
You can express yourself creatively using items from around the house in addition to stencils. such as cane (wicker or rattan), net, lace, doilies, stamps, wall stencils, or small stencils.
What Paint to Use for Stenciling Furniture?
To achieve the best results when stenciling furniture, use high-quality acrylic or latex paint. Furniture can benefit from being painted with craft acrylics.
What is Stencil Brush?
Brushes for stencils are rounded and chubby, with bristles that have been blunted at one end. The stencil brush is made to apply paint through a stencil to furniture so that it doesn’t bleed underneath the template.
How to Hand Paint Designs on Furniture?
On the wood, you can draw or sketch your pattern just like you would on a piece of paper. Use printable cutouts or carbon paper to copy your inspiration. Apply acrylic paint to your design using a small artist’s brush. Don’t stress about being perfect. For durability, allow it to dry before sealing it.
How to Seal Painted Furniture?
Not all paints needed to be sealed with a topcoat. For instance, you can use a sealer or topcoat like furniture wax to safeguard the finish when using latex or chalk paint.
Conclusion
The use of stencils, a wonderful and simple technique, allows for countless decorative options. Be inspired rather than intimidated! Simply adhere to these instructions, and you’ll soon be stenciling like a pro!