Here is everything you need to know about how to have a board and batten wall. It looks completely professional. Fortunately, you can design it yourself. Continue reading, you will learn how to DIY your own board and batten wall.
Table of Contents
What is DIY Board and Batten Wall?
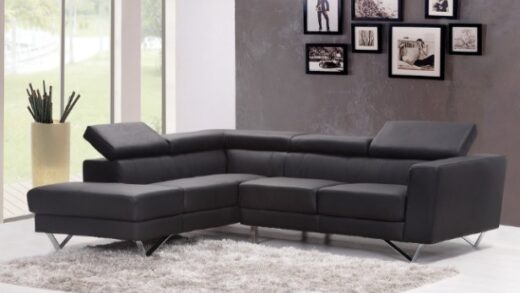
Since we intend to sell our home soon, we needed to update our guest bedroom but kept the design neutral. Board and batten walls, therefore, complement any style or color scheme.
We used the floating shelf above the bed as the top board for our planning since it was a good height.
Note: To determine where to place the wall’s battens, we taped a piece of printer paper to the surface.
The flooring was changed so it would match the rest of the house before the board and batten wall was constructed. You can see how we put the floor in our bedroom.
What You Will Need?
Twelve things should be prepared before starting to create a board and batten wall.
- Measuring tape
- Two-foot level (available from Home Depot)(opens in new tab)
- Vertical batten trim (I used 1 3/8″ pine lattice molding (opens in new tab) from Home Depot)
- Horizontal trim (I paired the same 1 3/8″ pine lattice molding(opens in new tab) with a thinner piece of decorative molding, which I placed at the top – see image below)
- Miter saw or miter box and hand saw
- Liquid nails (available from Home Depot)(opens in new tab)
- Caulk gun
- Brad nailer (available from Home Depot)(opens in new tab) (this linked version is my favorite because you don’t need an air compressor) and nails
- Painter’s caulk
- Sandpaper
- Primer
- Paint
How to Have a Diy Board and Batten Wall?
A beautiful addition to your decor is an accent wall. Although the board and batten walls may seem intimidating, you can add this striking statement to your bedroom or any other room in your house by following a few simple steps.
1. Measure the Width of the Wall
Measure your walls so you know how much trim to buy for your accent wall before you go to the hardware store. Both board (the horizontal trim pieces) and batten (the vertical trim pieces) are required.
Measure the width of each wall you’ll be paneling in inches to determine how much horizontal trim you need. When you visit the hardware store, make a note of the measurements on your phone.
If you plan to add trim to the bottom of your board and batten wall as well (I prefer this look whether or not you have a baseboard), you should buy twice as much trim as you need.
2. Measure the Length of the Batten
The batten, or vertical trim piece, is the next item you’ll need to measure for your board and batten wall project.
Choose the height of the board and batten first (we did ours about 2/3 of the way up the wall). Mark the location with a line using a pencil and a level.
Decide how far that line is from your baseboard or floor, and then measure that distance. Record this measurement on a piece of paper or on your phone. Your vertical trim or batten pieces will be this long.
Tip: If it’s a tricky measurement, like 42 3/8″ long, round down or up to a nice even number to make cuts a little easier, and adjust the height of your horizontal pieces accordingly.
Determine how many trim pieces you’ll need for the wall after determining the height of your vertical trim. A good rule of thumb is to space them roughly 18″ apart, give or take a few inches depending on the dimensions of your wall and the look you’re going for.
Note: Corner pieces must not be forgotten. To give our wall a more finished appearance, we added a trim piece in each corner, necessitating the purchase of two extra pieces of trim per wall.
3. Buy Your Trim
Go to the neighborhood hardware store with your measurements in hand. I bought 2.25″ wide flat, unfinished trim for both the horizontal and vertical pieces, and then bought an additional decorative molding piece to go around the top of the wall.
It was a lot thinner than the other trim, about .75″. Although this step is optional, I really like how it turned out in our home and advise it for houses with more traditional architecture.
You will need to cut the trim to fit it in your car because it is sold in lengths of 8 to 12 feet. You may occasionally be able to find someone at the hardware store who will perform all of your cuts for you. I had less luck when I went, so I had to cut them down to size so they would fit in my car.
4. Add Top and Bottom Pieces
Installing the horizontal trim pieces is the next step. Use a miter saw to cut the ends of the trim pieces to a 45-degree angle if you’re doing wall decor for an entire room so they fit together neatly at the corners. You can make a straight cut if you’re only doing an accent wall.
After that, attach the trim to the wall by adding a squiggly line of liquid nails to the back and making sure it is level with a level. Once it’s level, use a brad nailer to secure it to the wall, adding a nail every 3-4″. Repetition is necessary for the remaining walls and/or the bottom trim piece.
5. Add Batten Pieces/Vertical Trim
Cut the vertical pieces after installing the top and bottom trim. To determine the length of your pieces, measure the distance between the top and bottom pieces of trim (or your baseboard/floor).
At each of the far edges (or corners) of the wall, start by installing a piece of vertical trim (see illustration below).
From there, you should mark and measure the locations of each vertical length. To make sure your trim pieces are evenly spaced:
- Measure the width of the wall between the two corner trim pieces you just installed
- Measure the width of your trim piece
- Divide the width of the trim by the quantity of trim you have left for the wall. The middle of the wall in my situation had three pieces of trim. So I multiplied 3 x 2.25″ (the width of our trim), to get 6.75″
- Calculate the width of the wall by deducting this amount.
- Divide the result by the number of trim pieces you’re putting in (in our case, this was 3). You’ll space your trim pieces from edge to edge according to the resultant number.
Cut the remaining trim pieces to fit once you have your spacing measurement.
Finally, use liquid nails and a brad nailer to install each vertical trim piece.
6. Fill Nail Holes and Gaps Between Trim and Sand
It’s time to go back and fill in any nail holes and spaces between your wood pieces after your trim is installed. To seal cracks, use a painter’s caulk and a caulk gun. Remove any excess caulk with a paper towel or other cloth. After allowing the caulk to dry, smooth the caulked areas.
7. Prime and Paint
You’re finally prepared to start painting. You should prime your wood first if you’re using bare wood, as I did. If you’re using MDF that has already been primed, you can skip this step and move right on to painting. After painting your wall, you’re done.
Are Board and Batten Wall Outdated?
‘Many people have asked the question, “Are board and battens outdated?” To which my response is, “never.” says Sarah Symonds aka.
Although different board and batten sizes and designs appear to come and go as a trend, the fundamental idea of board and batten is timeless and classic. Vertical board and batten were very well-liked for a long time. The entryway has board and batten siding in this design. Modern board and batten have also been used to describe it.
How Thick Should Board and Batten Be?
‘If you’re dealing with a smaller bedroom in a house with 8 ft ceilings, you’ll want to use something in the 2.5″ to 3.5″ width range for the trim work,’ explains Daniel Bryant a father, a certified general contractor, and a co-founder of Home Like You Mean It.
‘If you’re installing it in a large living room with 10ft ceilings, you may want to move up to the 4.5″ to 5.5″ range or wood width. The trim shouldn’t feel overwhelming in a small space or suffocated and flimsy in a large living area.’
‘Although your aesthetic preferences will play a large role in this choice, the size of the room should be taken into account.’
What Kind of Wood is Used for Board and Batten?
‘You must use wood that is both insect and moisture-resistant if you intend to install exterior board and batten siding. According to Rebecca Fernandez, author at Restyled Homes Blog(opens in new tab), cedarwood, cypress, white oak, and redwood are a few popular options.
Pine is typically the wood of choice for interior projects because it doesn’t need to withstand the elements outside. To further cut costs, choose MDF rather than wood.
What is the Difference Between Shiplap and Board and Batten?
‘According to Catherine Ballard, author of board and batten wall, “shiplap and board and batten are two distinct wooden wall treatments.”
‘Board and batten refer to wooden boards installed with space between them, typically vertically, while shiplap refers to boards of the same width with grooves that help each board fit tightly together.
Now, do you know how to board and batten walls? Other issues about the process of creating board and batten walls? Having your own board and batten wall now.