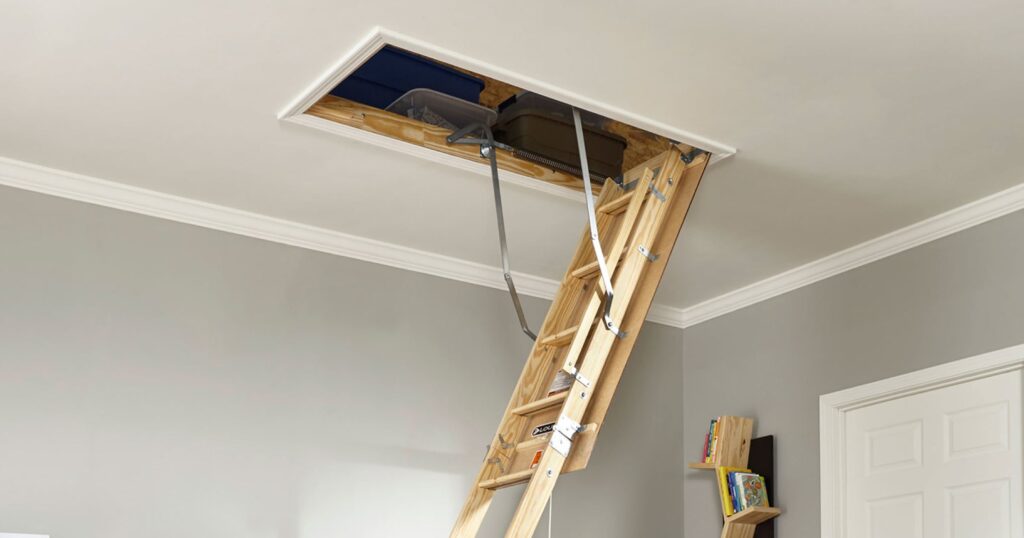
Use an attic ladder to make the most of the space on your roof. We’ll show you how to safely frame and install a ladder to meet your needs, whether you already have a cavity in your roof or you need to create one.
Table of Contents
Tools Of Install Attic Ladder
- Circular saw
- Drill
- Hacksaw
- Hammer
- Ladder
- Nail gun
- Packers
- Pencil
- Plasterboard saw
- Reciprocating saw
- Saw
- Saw horses
- Set square
- Spirit level
- Tape measure
Materials Of Install Attic Ladder
- Attic ladder
- Framing timber
- Screws
How To Install Attic Ladder?
1. Prepare The Attic Opening In Your Ceiling
The attic ladder’s length and width should be measured. Then choose the ladder’s center position in your hallway. From the center of the roof to one side, measure the width of the attic ladder in half. This will be one of the cavity’s sides. To get a crisp edge for the opening, repeat the process at the opposite end. The marks for your first length line should be joined using a level. Follow the same steps on the opposite side, and then draw lines to indicate where the cavity’s ends will be.
2. Cut The Attic Opening In Your Ceiling
Make sure there are no cables or pipes in the area where you are cutting where the lines are drawn before cutting with your plasterboard saw.
3. Create Your Framework Around The Opening
Determine which ceiling joists in your cavity need to be removed. If you do, make sure they aren’t designed to carry loads. Noggins are horizontal pieces of wood that are measured, cut, and fixed to the bearing boards around the frame. This will strengthen the area and stop the ceiling from sagging.
4. Put The Ladder Into Position
Ask a friend or family member to assist you in positioning the ladder. Hammer some scrap wood into the roof at either end of the ladder to temporarily brace it. To hold the ladder in place at the opposite end, nail the wood over the edge. The block should only cover the frame and not the door at the near end.
5. Get The Ladder Into Place
Squat against one of the noggins as you climb the ladder. To attach the ladder casing to the ceiling frame, carefully open the door. Prior to screwing or nailing, make sure the ladder is straight.
6. Pack The Unfixed Side To Square Off The Ladder
Packing must then be done on the side that hasn’t yet been fixed. In the void, insert some packers that have been broken to the width of the ladder kit. If the fit is too loose, the frame will be pulled out of the square, so make sure it is snug. Next, fasten the framing to that side as well.
7. Cut The Ladder Feet Off For A Square Finish
Measure from the ladder to the ground and then trim the bottom step to that measurement to ensure the ladder sits flush on the ground. Transpose that measurement downward from the joint. Then, with a handsaw, cut off the feet after marking them off on the ladder. The attic ladder’s ends’ plastic feet should be replaced.
8. Finishing Touches
Go back and add any additional screws you may have missed while the ladder was folded. You can take out the temporary blocks after making sure everything is level and the ladder closes properly. Put architraves around the cavity to complete the job and clean it up, and you’re done.
Remember that this installation won’t be finished in a hurry, it will likely take a full day. The easy access to additional storage that comes with your new ladder will be something you love once it is set up.