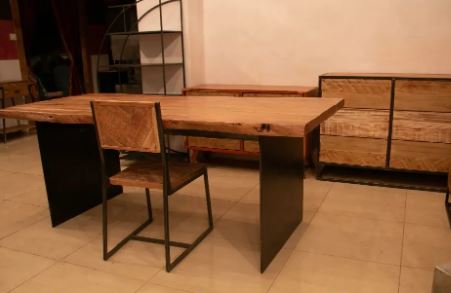
Although almost anything can be painted with chalk paint, including walls, kitchen cabinets, metal, wood, and even fabric, the most popular use is to chalk paint furniture or to make more contemporary pieces appear more antique.
How to chalk paint furniture? You will learn more about the ways to chalk paint furniture, and issues about chalk paint furniture you should care about.
Table of Contents
What Is Chalk Paint Furniture?
It’s crucial to comprehend what chalk paint actually is before comparing it to alternative finishes.
Although there are many different brands and formulations of chalk paint available, they all share a matte finish and a thick, chalky consistency that adheres well to crafts and furniture for a shabby chic appearance.
What Is The Difference Between Chalk Paint And Regular Paint?
If there is no chance of a stain bleeding through if the paint has a low sheen, and if you intend to use a protectant coat on top of the chalk-style paint, chalk paint adheres well to surfaces.
It sticks to surfaces like bare wooden furniture because of the grit or chalkiness.
Unfortunately, although it adheres well, it does not protect well or provide a flawless, smooth finish on your family heirloom.
How To Chalk Paint Furniture?
Here are six steps to chalk paint furniture as follows:
Step 1: Preparation is Key
Even though priming or sanding is not necessary, you still need to prepare the furniture in advance. Drawer handles should be taken off to ensure a smooth finish, and surfaces should be cleaned with a damp cloth to get rid of dirt, grime, and grease. Put down a dust sheet as well, don’t forget. Give your furniture a quick wipe down with Frenchic Sugar Soap if there are any greasy or stubborn stains (you’ll need 1 part sugar soap to 4 parts warm water). To ensure that the paint adheres to the wood, you need a clean surface.
Step 2: Get Your Brushes Ready
Purchase some new paintbrushes if you plan to chalk-paint furniture at home. According to the experts at Frenchic, the best brush for painting on oak furniture is an oval paintbrush; it’s made with a careful mixture of natural and synthetic fibers to produce the best result for your project. When it comes to reaching those tight corners, an angled detailed brush should do the trick. Meanwhile, flat brushes are great to have on standby as these can cover large smooth surfaces easily. A stencil brush is also an option for anyone with a creative streak.
Step 3: Apply the Paint
One of the simplest chalk paint furniture is chalky paint because of its thickness. Once the tin is open, stir the contents to check for perfect consistency. Following that, directly cover the surface with the paint after dipping your brush in.
‘Don’t be afraid to stroke the piece in all directions with the brush. Mark Husband, Leader Doors’ Product Development Lead, explains that this part doesn’t need to be neat or exact—just get the paint on there.
Consider creating a color wash, a lighter paint effect that subtly colors the furniture, if you want to make a statement. Simply decant some paint into a clean tray and add a little water to accomplish this. Apply it to the furniture after a quick mix.
Not exactly what you were looking for? Try out the worn look. ‘To achieve this, use a dry brush and little paint to avoid creating harsh brush streaks, advises Frenchic. Going for a shabby chic look? Simply paint the pine furniture, then allow it to completely dry. Then, use some sandpaper to remove some of the paint from the handles, corners, and edges to reveal the raw wood underneath.
Step 4: Wait for the Paint to Dry
Wait for it to dry after applying the first coat of paint and declaring it satisfactory. This may take anywhere from one to three hours, depending on the ambient temperature. Although it might appear patchy as it dries, the second coat will cover this.
Keep an eye out for any paint drips as it dries; these can be difficult to remove later. Also, make sure the paint is applied evenly.
Step 5: Apply Your Second Coat
For a smooth, uniform finish, apply a second coat of chalk paint to cover any thin spots and streaks. Apply a second coat in the same way, moving your brush in all directions to cover the entire piece, once the first coat is dry to the touch. Retouch any patchier areas, but be careful not to apply the paint too thickly; instead, build it up as necessary.’
Trying to achieve the shabby chic look? Simply paint the furniture, then allow it to fully dry. ‘Then, apply some sandpaper to the edges, corners, and handles to remove some of the paint and reveal the raw wood underneath,” advises Frenchic. ‘Leave the paint to completely dry between coats if you want to achieve a multi-coat shabby chic effect by layering one bold color underneath another. You’ll need at least two coats for a more reflective finish in the same color.’
Step 6: Complete the Look With Chalk Paint Wax
Wax sealing is the last step in the professional method for chalk paint furniture. This step is optional, but it can help the paint last longer, give it a more polished, five-star feel, and allow you to create artistic paint effects. Your meticulously painted surface will be protected by the wax as it absorbs into the wood.
Simply spread it on thickly with a bristle brush or a lint-free cloth. If you decide to use wax, make sure that the entire area is covered. It’s important to remember that wax takes up to two weeks to harden completely, so take care when handling the furniture in question.
Wax can also be substituted as a protective finish on furniture by lacquer.
BEST FURNITURE PAINTING TIPS
Unsure of how to start transforming a piece of furniture? Get the FREE printable checklist that walks you through each step and saves you time and money by demonstrating the exact procedure I’ve used on numerous furniture pieces. The cost to you is zero.
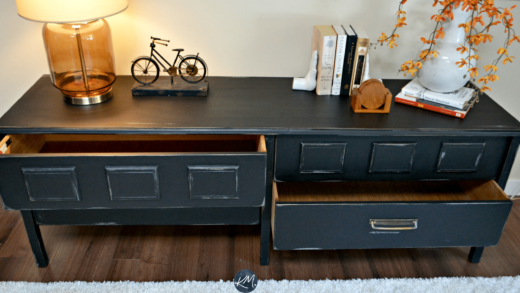
Once it has dried, add finishing touches to your pieces of furniture, such as a picture frame on the nightstand, new doorknobs for the kitchen cabinets, or a vase of dried flowers for a chest of drawers. It’ll appear brand-new!
What Are Mistakes To Avoid?
1. Overloading your brush
“Avoid using too much brush! This is such an important rule with all painting”, Annie tells House Beautiful UK. ‘While adding paint is easy, removing it is much more difficult! Overpainting can result in messiness, oozing, and smudging. To remove the excess product after each dip, wipe your brush or roller on a lint-free cotton cloth or your roller tray.
2. Painting the top side first
‘Turning a chair upside down and painting the underside first is crucial, especially when painting a chair, says Annie. ‘In addition to being a fun way to paint, you won’t miss any details that way. Some people think painting chairs is boring, but I love it!’
3. Waiting too long before removing stencils or tape
‘Instead of waiting until the paint is fully dry, let it dry slightly before removing a stencil. This holds true for painter’s tape as well; dry paint may potentially crack when the tape is removed, so it’s best to apply it when the paint is dry enough not to run but still slightly wet, she adds.
4. Following trends
‘People often ask me “what’s on trend now to paint my kitchen”. It really comes down to what you like,” says Annie. ‘If you don’t like the color red but are being advised to paint your kitchen that color by fashion, don’t. You must put up with it!’
5. Overthinking
‘Have fun, she advises, and think things through before acting on them, but not to the point of inertia. ‘Using my Pearlescent Glaze and chalk paint, you can create any effect, from industrial rustic to a bone-inlay look. Choose your style before you begin, and make sure it matches your personality and your home.
‘One of my favorite hints is to paint something neutral on the outside and then add a splash of vibrant color on the inside; you’ll smile every time you open a drawer or a wardrobe. Be daring with color—it brings joy!’
Where To Buy Chalk-based Furniture Paint?
Either through her website or reputable paint retailers, you can purchase Chalk Paint. Rust-Oleum and Frenchic, as well as a few home improvement retailers like B&Q and Wilko, also sell comparable chalk-based furniture paint.
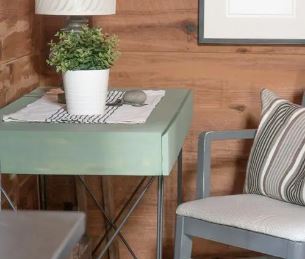
The most popular colors are usually grey, white, and black, but there are a wide variety of colors you can choose from, including pastel shades (like blush pink and mellow yellow), neutral shades (like sage green and soft grey), and jewel tones (like midnight blue and emerald green).
Additionally, you aren’t limited to chalk painting furniture; you can also get a chalky finish on walls, floors, and outdoor furniture.
What Problems Are Chalk Paint Furniture Have?
Of course, chalk paint furniture has its limitations, so to make sure you won’t regret it later, please be aware of the following possible problems.
Many people have questioned me about the best paint for furniture that doesn’t require sanding. However, sanding furniture is necessary to add enough grit or tooth to the freshly cleaned surface so that the paint will adhere.
Sanding can occasionally be avoided when chalk painting furniture because chalk paint is more porous and has some glue-like characteristics.
But I’ve yet to come across an antique piece of furniture that didn’t need at least a little preparation, such as sanding, priming wood knobs, filling in nicks, deep scratches, or minor areas of general wear and tear with wood filler.
There will inevitably be places you want to sand down so that your piece looks its best in your house unless your entire piece is in pristine condition. Also, any glossy or slick surface will need to be sanded because the paint won’t adhere to a shiny surface.
Do You Have To Sand Before Using Chalk Paint?
Sanding the surface will make it more porous, which will help the paint adhere if you’re using chalk paint on stained wood furniture.
On raw wood, chalk paint can be applied without first sanding, but even then, you’ll probably want to do so because of the possibility of splintered edges.
The majority of furniture pieces must be sanded before applying chalk paint to wood furniture. If you want to get an electric sander a try, here are some budget-friendly options: Best Electric Sanders for Furniture.
Now, do you know more about how to chalk-paint furniture? Starting your own chalk paint furniture.